So our screened-in back porch is amazing! Andrew and I absolutely love being able to sit out there under the fan and eat dinner with no bugs bothering us. It still needs a lot of work to make it pretty, but I’ve been working on it-slowly but surely.
Something that had been bugging me is all of the grilling necessities – charcoal, lighter fluid, matches, scraper, etc, just sitting out there. I knew that they need to be out there, but I hated them just lying around. I went to our local Goodwill and found an old tv stand with doors on the bottom that I thought would be a great size for all the grilling supplies without being overwhelming. The best part though? It cost me $7.00.

Well this thing was ugly and outdated. It needed a facelift desperately. One of my friends Kristin had written a blog about using chalk paint to re-do furniture and I thought it was something I could do.
Check out Kristin’s blog here: http://sassysapperstein.com/2014/06/04/how-to-paint-with-chalk-paint/
**Kristin uses a different Chalk Paint recipe than I did, but they both worked, so either one can be used.**
I initially looked at buying chalk paint, but it was sort of pricy for just needing a little bit, so I did a little Pinterest Research and came up with the recipe I used.
Step 1: Prep your furniture
The great thing about chalk paint is really no prep is needed. You do not have to sand or anything, just give the piece a good wipe down to get rid of any dust or dirt. If you are planning to use multiple colors like I did, you will need to use painter’s tape to mark off the parts you want a specific color.
Step 2: Make your paint
You will need 1/2 cup of Plaster of Paris mixed with 1/2 cup of water. Mix well-I used a whisk. Next pour in 1 cup of any paint you wish to use and mix together until it is nice and smooth.
I used two different colors, black and a light blue.

Step 3: Paint
This paint was so weird for me to use. It’s a little thicker than normal and your strokes don’t matter on the first coat. Depending on the color, more coats may be necessary. I ended up putting on 4 coats of black and only 2 of blue. This seems like it would be tedious, but the paint dries within 30 minutes and you are ready to do another coat.

You can see how I had to tape off certain parts and how weird the stroke marks look at first.

This is what the black looked like after the second coat.
Step 4: Wax
I used a Minwax matte varnish finishing wax that I purchased from Lowe’s…it was my only option and worked really well so I was pleased with the outcome. The purpose of the wax is to make the chalkiness of the paint go away and leave the piece with a nice shine. I used cut up t-shirts to wax it all over and it worked perfectly.

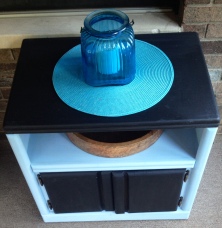

I was definitely pleased with how the table turned out! Its cheery and fills up the awkward corner in between the steps and the screen door. The cabinet underneath is perfect for all the grilling supplies and this project is one of my Top 10 easiest!
Project Math:
Cabinet $7.00
Blue Paint- $2.98 (I bought a sample size and had some left over)
Black Paint- $0 (I had this left over from a previous project)
Wax- $9.97
Plaster of Paris- $6.78
Total Cost: $26.73
Normally this is more than I am willing to spend on one project, but I have supplies left over that will definitely be used to paint other pieces after seeing how easily this was done. 🙂


